Elcometer 456 Coating Thickness Gauge
The Elcometer 456 dry film thickness gauge is available in three different models. Each coating thickness gauge provides the user with increasing functionality - from the entry level Elcometer 456 Model B, to the top of the range Elcometer 456 Model T.
Integral coating thickness gauges are ideal for single handed operation as the wide footprint of the Bigfoot™ internal probe provides greater stability during coating thickness measurement - allowing for consistent, repeatable and accurate dry film thickness results.
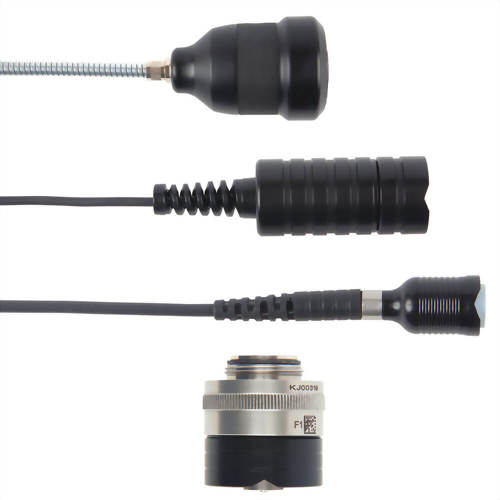
Separate coating thickness gauge models, with their wide range of probes, provide even greater dry film thickness measurement flexibility.
Compatible with ElcoMaster® software and ElcoMaster® Mobile App, individual coating thickness measurements can be transferred via USB or Bluetooth® to PC or a mobile device for analysis and instant report generation.
The Elcometer 456 Coating Thickness Gauge sets new standards; providing reliable and accurate coating thickness measurements; helping you to become more efficient.
The Elcometer 456 dry film thickness gauge is available in three different models. Each coating thickness gauge provides the user with increasing functionality - from the entry level Elcometer 456 Model B, to the top of the range Elcometer 456 Model T.
Integral coating thickness gauges are ideal for single handed operation as the wide footprint of the Bigfoot™ internal probe provides greater stability during coating thickness measurement - allowing for consistent, repeatable and accurate dry film thickness results.
Separate coating thickness gauge models, with their wide range of probes, provide even greater dry film thickness measurement flexibility.
Compatible with ElcoMaster® software and ElcoMaster® Mobile App, individual coating thickness measurements can be transferred via USB or Bluetooth® to PC or a mobile device for analysis and instant report generation.
Halve inspection times using the Elcometer 456 Coating Thickness Gauge with Scan Probe
When used in conjunction with the Elcometer 456 Coating Thickness Gauge Scan or Auto Repeat Mode, the Scan Probe enables users to significantly reduce dry film thickness inspection times without affecting accuracy.
With a reading rate of 140 readings per minute, the Elcometer 456 Coating Thickness Gauge with Scan Probe allows you to inspect more coatings in less time.
Key features of the Elcometer 456 Coating Thickness Gauge include:

- Large buttons ideal for gloved hands
- Easy to use menus in multiple languages
- High contrast colour LCD with auto rotate
- High and low reading limit indicators
- Factory calibrated for immediate use
Accurate
- Thickness measurement capability to ±1%
-
Can be used in accordance with National & International Standards
- Temperature stable measurements
- Increased reading resolution for thin coatings
- Measures accurately on smooth, rough, thin and curved surfaces

- Repeatable and reproducible
- 2 year gauge warranty
- Supplied with fully traceable test certificates
- Batch date and time stamp facility
Rugged
- Sealed, heavy duty and impact resistant
- Dust and waterproof equivalent to IP64
- Scratch and solvent resistant display
- Durable gauge and probe construction
- Suitable for use in harsh environments

- Fast reading rate of 70+ per minute, 140+ per minute with Scan Probe
- Multiple calibration memories
- Alpha numeric batch identification
- User selectable calibration methods
- Compatible with ElcoMaster® and ElcoMaster® Mobile App
Powerful
- Wide range of interchangeable probes
- USB and Bluetooth® data output to iPhone* or Android™ devices
- Stores up to 150,000 readings in 2,500 batches
- Measures up to 31mm (1220mils) of coating on metal substrates
The importance of Coating Thickness Gauge Calibration
Formal quality systems, such as those described in ISO 9001, require coating thickness gauges to be properly controlled, logged and calibrated. Increasingly, users are specifying that the readings taken by thickness gauges are traceable to National Standards.
Elcometer offer a comprehensive range of certified foils together with zero test plates to ensure the accuracy of the coating thickness gauge.
Get the best performance from the Elcometer 456 Coating Thickness Gauge and make the best use of the gauge’s ±1% accuracy by calibrating the coating thickness instrument to suit the application. This video will guide you through a range of calibration options for both the integral and the separate models.
*Compatible with iPod, iPhone and iPad.
Elcometer 456 Models S & T: Made for iPhone 6 Plus, iPhone 6, iPhone 5s, iPhone 5c, iPhone 5, iPhone 4s, iPhone 4, iPad Air 2, iPad mini 3, iPad Air, iPad mini 2, iPad (3rd and 4th generation), iPad mini, iPad 2, and iPod touch (4th and 5th generation).
“Made for iPod,” “Made for iPhone,” and “Made for iPad” mean that an electronic accessory has been designed to connect specifically to iPod, iPhone, or iPad, respectively, and has been certified by the developer to meet Apple performance standards. Apple is not responsible for the operation of this device or its compliance with safety and regulatory standards. Please note that the use of this accessory with iPod, iPhone, or iPad may affect wireless performance.
iPad, iPhone, and iPod touch are trademarks of Apple Inc., registered in the U.S. and other countries. App Store is a trademark of Apple Inc., registered in the U.S. and other countries. Suitable for mobile devices running Android™ software version 2.1 and upwards. Android™ and Google Play are trademarks of Google Inc.
Technical Specification
|
Integral Model Options |
|||||||||
|
Scale 1 |
Range: 0-1500μm (0-60mils) |
Accuracy*: ±1-3% or ±2.5μm (±0.1mil) |
|||||||
|
Resolution: 0.1μm: 0-100μm; 1μm: 100-1500μm (0.01mil: 0-5mils; 0.1mil: 5-60mils) |
|||||||||
|
Model B |
Model S |
Model T |
C |
||||||
|
Elcometer 456 Ferrous Integral |
A456CFBI1 |
A456CFSI1 |
A456CFTI1 |
● |
|||||
|
Elcometer 456 Non-Ferrous Integral |
A456CNBI1 |
See separate gauges with N2 PINIP™ Probe |
See separate gauges with N2 PINIP™ Probe |
● |
|||||
|
Elcometer 456 Dual FNF Integral |
A456CFNFBI1 |
A456CFNFSI1 |
A456CFNFTI1 |
● |
|||||
|
Scale 2 |
Range: 0-5mm (0-200mils) |
Accuracy*: ±1-3% or ±20μm (±1.0mil) |
|||||||
|
|
Resolution: 1μm: 0-1mm; 10μm: 1-5mm (0.1mil: 0-50mils; 1mil: 50-200mils) |
||||||||
|
For higher resolution & accuracy on thin coatings Scale 2 gauges can be switched to the Scale 1 mode measurement performance |
|||||||||
|
Model B |
Model S |
Model T |
C |
||||||
|
Elcometer 456 Ferrous Integral |
A456CFBI2 |
See separate gauges with F2 PINIP™ Probe |
See separate gauges with F2 PINIP™ Probe |
● |
|||||
|
Scale 3 |
Range: 0-13mm (0-500mils) |
Accuracy*: ±1-3% or ±50μm (±2.0mils) |
|||||||
|
Resolution: 1μm: 0-2mm; 10μm: 2-13mm (0.1mil: 0-100mils; 1mil: 100-500mils) |
|||||||||
|
Model B |
Model S |
Model T |
C |
||||||
|
Elcometer 456 Ferrous Integral |
A456CFBI3 |
See separate gauges with F3 PINIP™ Probe |
See separate gauges with F3 PINIP™ Probe |
● |
|||||
|
Separate Model Options |
|||||||||
|
Model B |
Model S |
Model T |
C |
||||||
|
Elcometer 456 Ferrous Separate |
A456CFBS |
A456CFSS |
A456CFTS |
● |
|||||
|
Elcometer 456 Non-Ferrous Separate |
A456CNBS |
A456CNSS |
A456CNTS |
● |
|||||
|
Elcometer 456 Dual FNF Separate |
A456CFNFBS |
A456CFNFSS |
A456CFNFTS |
● |
|||||
|
Probes are supplied separately |
|||||||||
* Whichever is the greater
● Certificate supplied as standard
| Product Features | ■ Standard | □ Optional | |
| Model B | Model S | Model T | |
|
Fast, accurate reading rate; 70+ readings per minute |
■ |
■ |
■ |
| Repeatable & reproducible measurements | ■ | ■ | ■ |
| Easy to use menu structure; in 30+ languages | ■ | ■ | ■ |
| Tough, impact, water & dust resistant; equivalent to IP64 | ■ | ■ | ■ |
| Bright colour screen; with permanent back light |
■ |
■ |
■ |
| Scratch & solvent resistant display; 2.4" (6cm) TFT |
■ |
■ | ■ |
| Large positive feedback buttons | ■ | ■ | ■ |
| USB power supply; via PC | ■ | ■ | ■ |
| Test certificate | ■ | ■ | ■ |
| 2 year gauge warranty* | ■ | ■ | ■ |
| Automatic rotating display; 0°, 90°, 180° & 270° | ■ | ■ | ■ |
| Ambient light sensor; with adjustable auto brightness | ■ | ■ | ■ |
| Emergency light | ■ | ■ | ■ |
| Tap awake from sleep | ■ | ■ | ■ |
| Gauge software updates¹; via ElcoMaster® software | ■ | ■ | ■ |
| Data output | ■ | ■ | ■ |
|
■ | ■ | ■ |
|
■ | ■ | |
| On screen statistics | ■ | ■ | ■ |
|
■ | ■ | ■ |
|
■ | ■ | ■ |
|
■ | ■ | ■ |
|
■ | ■ | ■ |
|
■ | ■ | ■ |
|
■ | ■ | ■ |
|
■ | ■ | ■ |
|
■ | ■ | |
|
■ | ■ | |
|
■ | ■ | |
|
■ | ■ | |
|
■ | ■ | |
| Live reading trend graph; in batch mode | ■ | ■ | |
| ElcoMaster® software & USB cable | □ | ■ | ■ |
| Replaceable screen protectors | □ | ■ | ■ |
| Protective case | ■ | ■ | ■ |
| Plastic transit case | □ | □ | ■ |
| Integral models; with automatic gauge switch on | ■ | ■ | ■ |
|
F, N, FNF | F, N, FNF | F, N, FNF |
|
0-13mm 0-500mils |
0-1500μm 0-60mils |
0-1500μm 0-60mils |
| Separate models; with automatic probe recognition | ■ | ■ | ■ |
|
F, N, FNF | F, N, FNF | F, N, FNF |
|
0-30mm 0-1200mils |
0-30mm 0-1200mils |
0-30mm 0-1200mils |
| On-screen calibration instructions; in 30+ languages | ■ | ■ | ■ |
| Multiple calibration methods | ■ | ■ | ■ |
|
■ | ■ | ■ |
|
■ | ■ | ■ |
|
■ | ■ | ■ |
|
■ | ■ | |
| Predefined calibration & measurement methods | ■ | ■ | |
|
■ | ■ | |
| Automatic calibration; for rapid calibration | ■ | ■ | |
| Calibration memory type; gauge (g) or gauge & batch (gb) | g | gb | gb |
| Number of batches; with unique calibrations | 1 | 2,500 | |
| Calibration memories; 3 user-programmable memories | ■ | ||
| Measurement outside calibration warning | ■ | ||
| Calibration lock; with optional PIN code unlock | ■ | ■ | ■ |
| Delete last reading | ■ | ■ | ■ |
| Gauge memory; number of readings | Last 5 | 1,500 | 150,000 |
| Individual batch calibrations; sent to PC via ElcoMaster® | ■ | ■ | ■ |
| Limits; user definable audible & visual pass/fail warnings | ■ | ■ | ■ |
|
g | gb | |
| Date and time stamp | ■ | ■ | |
| Batch types; normal, counted average, IMO PSPC | ■ | ■ | |
|
Navsea Mode |
■ | ||
| Batch review graph | ■ | ||
| Review, clear & delete batches | ■ | ■ | |
| Copy batches and calibration settings | ■ | ||
| Alpha-numeric batch names; user definable on the gauge | ■ | ||
|
Scan & Auto Repeat Modes; with Scan probe connected |
■ |
||
| Fixed batch size mode; with batch linking | ■ | ||
* The Elcometer 456 is extendable within 60 days from date of purchase, free of charge, to 2 years
1 Internet connection required
ǂ Visit www.elcometer.com/sdk to find out how to integrate Elcometer's MFi certified products to your App
2 Elcometer Index Values are used in the automotive industry to assess a coating’s overall quality; USA patent number US7606671B2
3 FNF patent number USA: 5886522
4 Zero Offset USA patent number US6243661
| Technical Specification | |
| Display information | 2.4" (6cm) QVGA colour TFT display, 320 x 240 pixels |
| Battery type | 2 x AA dry cell batteries, rechargeable batteries can also be used |
| Battery life | ~24 hours of continuous use at 1 reading per second5 |
| Gauge dimensions (h x w x d) | 141 x 73 x 37mm (5.55 x 2.87 x 1.46") |
| Gauge weight | 161g (5.68oz) including supplied batteries |
| Operating temperature | -10 to 50°C (14 to 122°F) |
| Packing List | Elcometer 456 gauge, calibration foils (integrals only), wrist harness, transit case (T), protective case (B, S, T), 1 x screen protectors (S, T), 2 x AA batteries, operating instructions, USB cable (S, T), ElcoMaster® software (S, T) |
5 Using default settings & lithium batteries supplied, alkaline or rechargeable batteries may differ
STANDARDS:
AS 2331.1.4, AS 3894.3-B, AS/NZS 1580.108.1, ASTM B 499, ASTM D 1186-B, ASTM D 1400, ASTM D 7091,
ASTM E 376, ASTM G 12, BS 3900-C5-6B, BS 3900-C5-6A, BS 5411-11, BS 5411-3, BS 5599, DIN 50981, DIN 50984,
ECCA T1, EN 13523-1, IMO MSC.215(82), IMO MSC.244 (83), ISO 1461, ISO 19840, ISO 2063, ISO 2360, ISO 2808-6A,
ISO 2808-6B, ISO 2808-7C, ISO 2808-7D, ISO 2808-12, NF T30-124, SS 184159, SSPC PA 2, US Navy PPI 63101-000,
US Navy NSI 009-32, ISO 2178
Standards in grey have been superseded but are still recognised in some industries.
Accessories

|
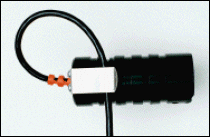
Jumbo Hand Grip Ideal for precision placement for the most accurate results on flat and curved surfaces. Place the probe inside the Jumbo Hand Grip and take measurements - ideal when wearing gloves. Suitable for any Elcometer 456 Scale 1 or Scale 2 straight probes. |
||
|
F and N Probes |
Dual FNF Probes |
||
| T9997766- | T99913225 |
Jumbo Hand Grip |
|

|
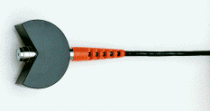
V-Probe Adaptor Ideal for precision placement for the most accurate results on medium and large diameter curved surfaces such as pipes and cylinders. Suitable for any Elcometer 456 Scale 1 or Scale 2 straight probes. |
||
|
F and N Probes |
Dual FNF Probes |
||
|
T9997381- |
T99913133 |
V-Probe Adaptor |
|

|
Ultra/Scan Probe Replacement End Caps Highly durable - when tested on smooth surfaces probe end caps have been scanned in excess of 50 km (30 miles) - each end cap snaps on to the end of the Ultra/Scan probe significantly enhancing the lifetime of the probe. |
||
|
F & Dual FNF Probes |
|
||
|
T456C23956 |
Replacement Ultra/Scan Probe End Caps (3 per pack) |
||

|
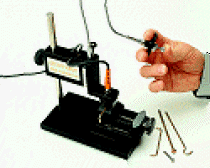
Probe Placement Jig The Elcometer probe placement jig is the ideal accessory for measuring coatings on small or complex components when the highest levels of repeatability and accuracy are required.
|
||
|
T95012880 |
Probe Placement Jig |
||
|
Each probe placement jig is supplied with a probe housing and a component holder to suit Scale 1 or Scale 2 straight probes. |
|||
|
T95013028 |
Component Hand Vice |
||
|
T95012888 |
Cable Release Assembly - ideal for remote measurements |
||
|
T95015961 |
Dual FNF Probe Housing Adaptor |
||
|
T95016896 |
Mini Probe Housing Adaptor |
||

|
Calibration Foils/ Coated Standards/ Zero Test Plates Elcometer offers a range of individual precision foils, foil sets, coated thickness standards and zero test plates to ensure the greatest possible accuracy. |
||

|
Data Output Controller Enables data to be output from the Elcometer 456 via RS232 ports for the purposes of controlling automated production lines. The Elcometer Software Support Team, or users can produce their own customised software to utilise the data output from the Elcometer 456 gauge in order to remotely trigger pass/fail criteria for their processes.
|
||
|
T99925387 |
Elcometer Data Output Controller |
||
|
Operating Temperature |
0 to 50°C (32°F to 122°F) |
||
| Data Input | USB | ||
| Data Output |
One RS232 serial output via 9 way D-Type connector |
||
|
Power Supply |
Requires 5V 1A(min) DC supply via mini USB. External plug-in mains adapter with interchangeable UK/EU/US/AUS pins supplied |
||
|
Packing List |
Elcometer Data Output Controller, USB to RS232 converter lead, power supply (with 4 sets of interchangeable pins) |
||
|
T99922341 |
Self Adhesive Screen Protectors (x10) |
||
|
T99921325 |
USB Cable |
||
|
T45622371 |
Benchtop Inspection Stand - for Separate Gauges |
||
COATING THICKNESS GAUGE
How to measure dry film thickness using the Elcometer 456 Coating Thickness Gauge
Discover key attributes and benefits of the Elcometer 456 Coating Thickness Gauge. This video features the Elcometer 456 integral and separate models performing non-destructive coating thickness measurements on a variety of applications.


